Windows 11 - Enable RDP
Introduction
This guide will walkthrough enabling RDP on a Windows 11 VM.
Prerequisites
I highly recommend ensuring that the Windows 11 VM was followed to create the Windows 11 VM.
Enable RDP
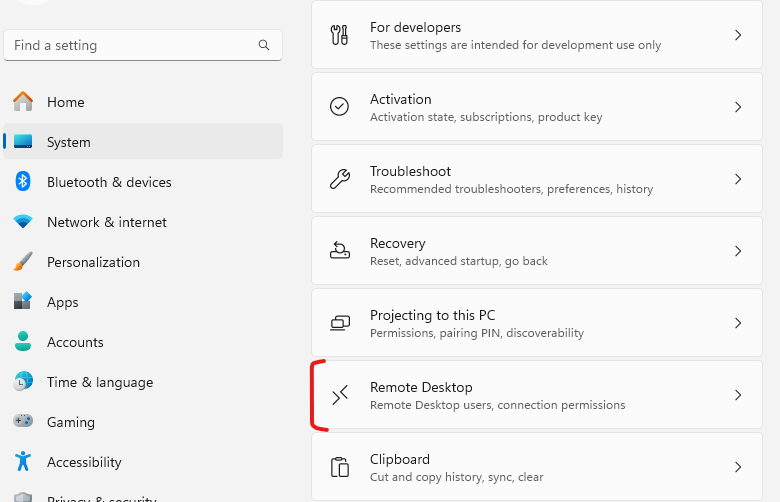
The first step is enabling RDP on the Windows 11 VM. Open up the KVM for the VM by right clicking on the VM and selecting "Console". A pop up should appear with access to your VM. Open up "Settings" by searching in the start menu. Then go to "System" and select "Remote Desktop"
Click the toggle to enable Remote Desktop. A pop up will appear, click "Confirm" to continue.
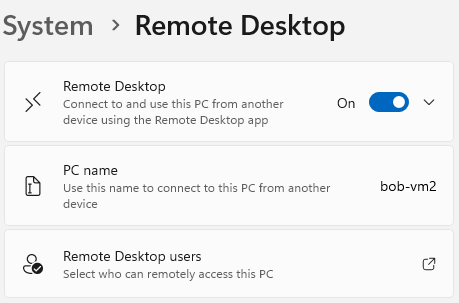
RDP should now be enabled.
Identify the VM IP
To log in via RDP, the IP address of the VM must be known. Go to the "Summary" page for your VM and identify the IPs section.
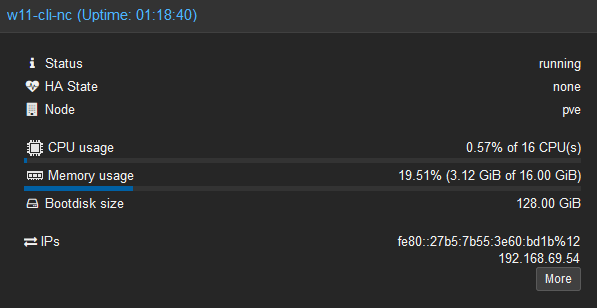
Make note of the IP as it will be needed to log into the VM via RDP
Connect to RDP
Close out of the browser Window for the KVM if still open, and open up RDP on the computer that will be logging into the VM via RDP. Enter the IP of the VM identified in the previous step.
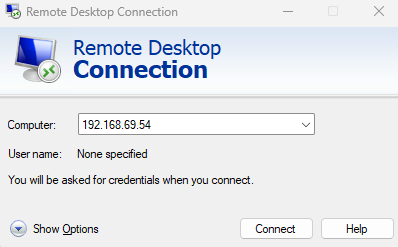
Click Connect, then enter the password when prompted. A pop up regarding "identifying the remote computer" will pop up. Check the box "Don't ask me again for connections to this computer" and then click "Yes". RDP will complete the connection and your desktop should appear.