Install FE Debian
- I typically manage my COMETs via SSH. If you have a keyboard and monitor hooked up then the instructions may be slightly different
- If using the COMET for Autonomys, I recommend using the FE Ubuntu Minimal for the greatest support
Prerequisites
To find the OS image, use the link provided in the CM3588 Wiki
Look for the section 4.4.3.1.1 Flash Official OS to eMMC then click the download link.

You will need to click the "Google Drive" logo, then select 01_Official images, > 02_SD-to-eMMC images and then download the one that starts with rk3588-eflasher-debian-bookworm. Do not extract/unzip the file after downloading as it is not required.
Before proceeding follow the below guides to prepare the Micro SD card.
- Prepare Your Micro SD Card (Windows)
- Write OS Image to Micro SD Card(Windows)
- Using Termius as an SSH Manager (Optional)
A monitor will be needed to view the automated installation process on first boot.
The HDMI port closest to the USB port is an INPUT. You must use the other 2 ports to get a video OUTPUT signal.
The following steps are the same whether installing the full desktop or minimal installation. Both provide Gnome desktop environments, however the minimal will have less packages installed making it smaller.
First Boot
Automated Installation
Once the Micro SD card has been prepared, insert it into the COMET and press the power button. The system should automatically begin installing the OS on the COMET.
I noticed that during the automated installation the 5" monitor I typically connect to my headless servers did not display the screen correctly (it was too small and cut off most of the screen) leaving me with just a gray screen. Plugging the COMET into my ultra wide allowed me to see the progress.
When the installation finishes press the power button to turn off the COMET.
Post Installation
Do not forget to remove the Micro SD Card. If left in the OS will be installed again and require another reboot
After the automated installation, make sure the Micro SD card is removed, then boot the COMET and log into the root account. Default credentials:
root
Username: root
Password: fa
The following steps can be performed if directly connected to the COMET via a keyboard & monitor. However, I will be performing these steps over SSH. Many of these steps are user-preference and are not required. These are my perferred steps.
Connect to the COMET via SSH
Identify the IP address of the COMET using your router (hostname is CM3588) or while logged into the Desktop environment with ip a. Then connect via SSH using the root user.
Change the root Password
Change the root password with
passwd
Set Default Sources
Backup existing sources
sudo mv /etc/apt/sources.list /etc/apt/sources.list.old
Open sources.list
sudo nano /etc/apt/sources.list
Paste in official sources, then press ctrl + x and then y and then enter to save.
deb http://deb.debian.org/debian bookworm main non-free-firmware
deb-src http://deb.debian.org/debian bookworm main non-free-firmware
deb http://deb.debian.org/debian-security/ bookworm-security main non-free-firmware
deb-src http://deb.debian.org/debian-security/ bookworm-security main non-free-firmware
deb http://deb.debian.org/debian bookworm-updates main non-free-firmware
deb-src http://deb.debian.org/debian bookworm-updates main non-free-firmware
deb http://deb.debian.org/debian bookworm-backports main non-free-firmware
deb-src http://deb.debian.org/debian bookworm-backports main non-free-firmware
Update Ubuntu
Ensure the latest packages are installed
apt update && apt upgrade -y
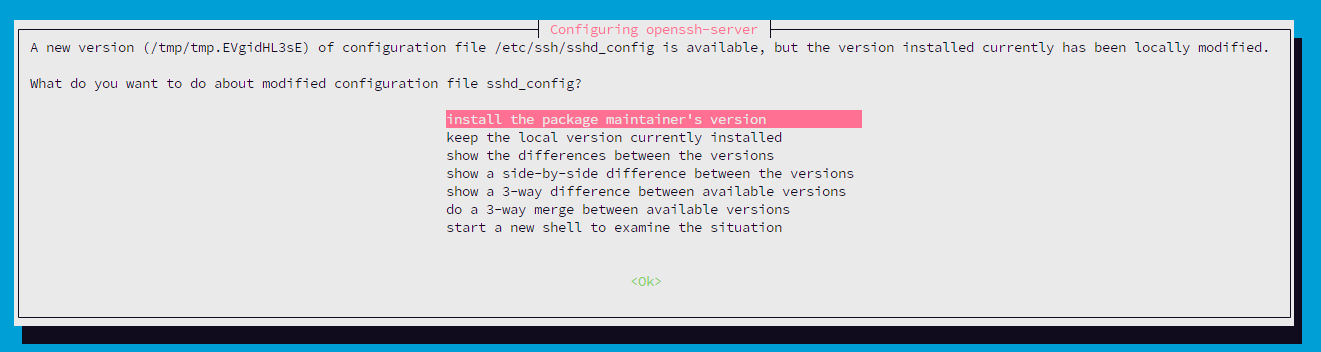
If prompted select to use the package maintainer's version of sshd_config
Install Dependencies
By default, some useful packages are not installed. I install these before proceeding
- nano - text editor
- htop - system monitor
apt install nano htop
User Management
I remove the pi user and create my typical hakehardware user. In addition, I turn off auto-login as I SSH into my COMETs and do not need auto-login.
Remove the pi user
userdel -r pi
Then add a new user
useradd -m -s /bin/bash <USERNAME>
Set the password for the user
passwd <USERNAME>
Add the user to the sudo group to allow commands to run as root with sudo
usermod -aG sudo <USERNAME>
Lastly, prevent root from logging in via SSH
nano /etc/ssh/sshd_config
Scroll down to
PermitRootLogin yes
Set it to the following value. Then press ctrl + x, then y, then enter to save.
PermitRootLogin no
Set the Hostname
By default, the hostname is CM3588. I prefer to change it to a custom value to easily identify the system
hostnamectl set-hostname <NEW_HOSTNAME>
Update the hosts file
nano /etc/hosts
Change any instance of CM3588 (there should only be 1) to whatever the new hostname is. Then press ctrl + x, then y, then enter to save.
Set Timezone & Locales
By default the timezone will be UTC. It is best to set the local timezone, if you are unsure what to choose list the possible timezones
timedatectl list-timezones
Use the page-up/page-down or the arrow keys to scroll. Press q to quit. Set the timezone to the correct timezone.
timedatectl set-timezone <Region/City>
Set the locales for bash
echo "export LC_ALL=en_US.UTF-8" >> ~/.bashrc
echo "export LANG=en_US.UTF-8" >> ~/.bashrc
echo "export LANGUAGE=en_US.UTF-8" >> ~/.bashrc
Finally, reboot the system for all the changes to take effect. Make sure to log in with your new non-root user on reboot.
reboot now
That completes the installation and set up.