Prepare Farmer Disks - Disk Management (GUI)
This guide involves steps which will wipe a disk and format it with a new file system. All data on the disk will be lost. Ensure the correct disk is being wiped and back up any data prior to proceeding.
Disks that will be used to farm on the Autonomys network must be prepared before connecting to them to the Farmer. This guide covers how to wipe an entire disk with Disk Management so that it can be fully utilized by the Autonomys Farmer.
Identify Disks
The first step is to identify the disks that will be used for Autonomys. Open up diskpart by pressing WIN + x and then selecting "Disk Management". This will bring up the Disk Management tool.
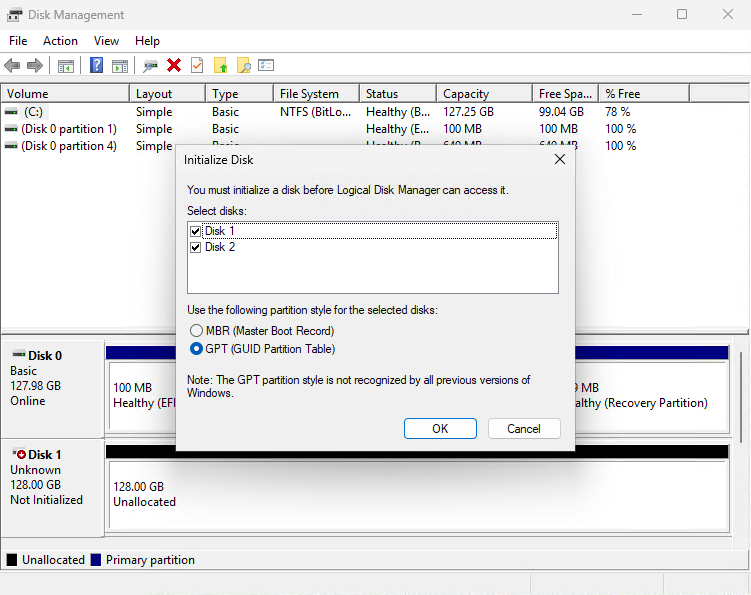
If a disk does not have a GPT partition a prompt will be displayed requesting to intialize the disks. Click "OK" to initialize the disks
Using the GUI, identify the disk that will be used for Autonomys.
Clean Disks
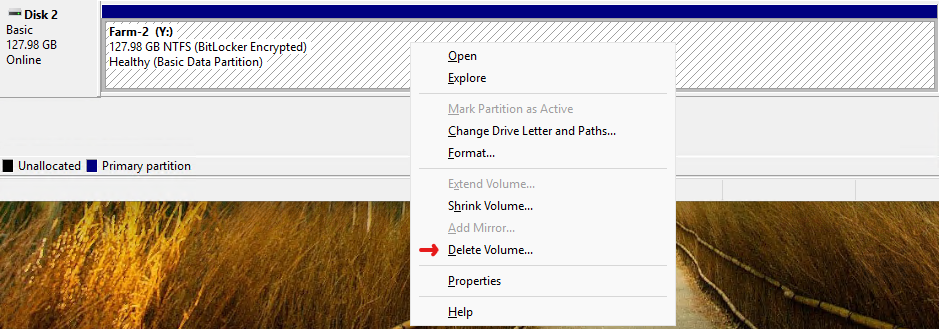
If the disk already has a partition, it will need to be deleted before the new volume can be created. This step does not need to be done if the disk is labeled as "Unallocated".
Right click on each parition, and select "Delete Volume". Then proceed through the prompts to continue. If a notice is given that the disk is currently in use, be absolutely sure that the data is not needed. In this case, it is usually better to identify what is using the disk first, stop it, then delete the volume.
The disk should now be listed as "Unallocated".
Create Volume
New Volume
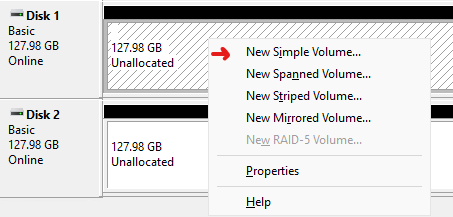
Right click on the disk and select "New Simple Volume".
Click "Next" to begin the "New Simple Volume Wizard".
Volume Size
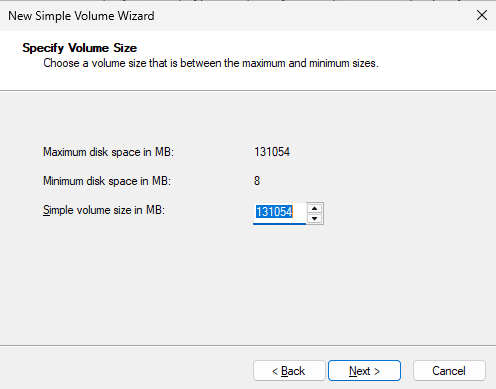
On the "Specify Volume Size" page, leave the "Simple volume size in MB" as the default number to use the entire volume. Click "Next" to continue.
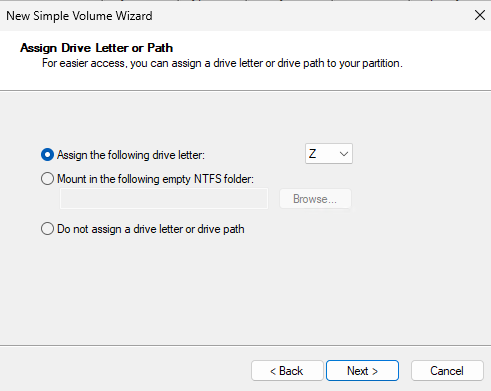
Drive Letter
Assign a drive letter to the disk. I usually start from the end of the alphabet for my Autonomys disks. Click "Next" to continue.
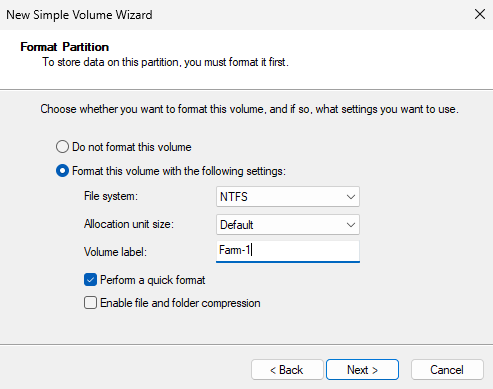
Format Partition
On the "Format Partition" screen, leave the defaults, but add a "Volume Label" to describe the disk. I usually use something like "Farm-1", and then on the next disk "Farm-2", etc.. This will help keep things organized. Once the label has been provided, click "Next" to continue.
Confirmation
Finally, click "Finish" to execute the volume creation. Once completed, the disk information will be populated in the Disk Management tool.

Repeat the steps for each disk to prepare them for the Autonomys Farmer.