Farmer (Cluster)
Prerequisites
- To run a Farmer you must have a Node running
- Prepare Farmer Disks if you have not already
- NATS must be running
- Ports Forwarding
- Check the Official Autonomys Wiki
- Check the Official Wiki
- Check Official GPU Plotting Wiki
- Check the Official Cluster Wiki
Cluster Overview
At a high level, a Cluster breaks the Farmer into four parts:
- Controller - Like the brians of the operation
- Cache - Stores the
piece_cache.bin. On a Non-Cluster setup this is split between all the Farm disks - Plotter - In charge of plotting and replotting
- Farmer - In charge of managing the Farm disks
Generally speaking, each host on a cluster can run one or all of these components. There are some nuances, such as each Controller must have its own cache-group.
The benefit of a Cluster is the division of responsiblities, which allows multiples of each component to be deployed across multiple hosts. You can have as many Farmers as you want. As many Plotters as you want, etc.. Another benefit is more control over the Cache, which may result in faster plotting.
The downside is more complexity.
Organization
Organization is subjective, but in this wiki and the following ones this organization structure will be used for the Autonomys components.
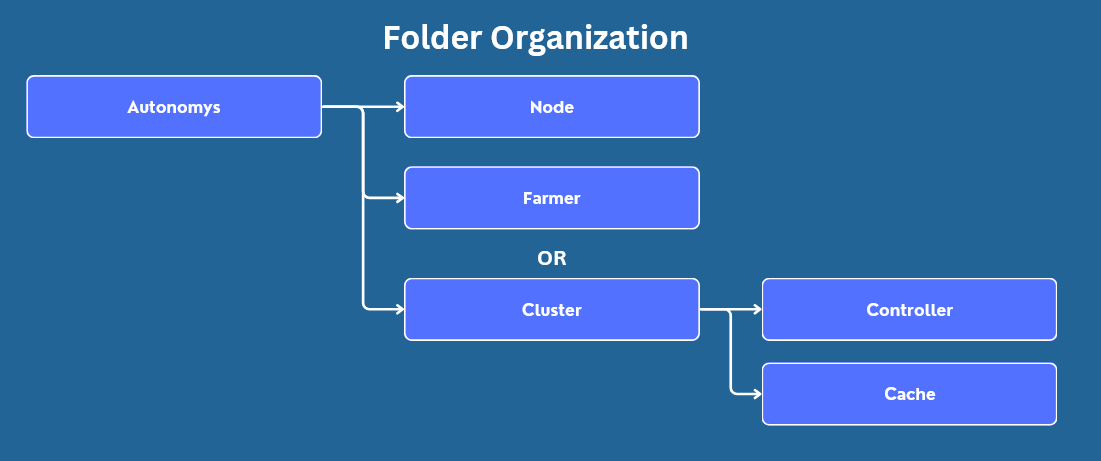
Create Cluster Folder
Create the "Autonomys" parent folder if it does not already exist. Then create a subfolder for the "Cluster". The Farmer folder does not need to be created if running a Cluster. Within the Cluster folder, create a subfolder for the Controller and Cache.
The Cache folder will store the piece_cache.bin which may eventually get quite large (in 3h testnet it was over 100GB). For this reason, a different location could be used to store the piece cache if space is limited on the OS disk. Simply update the the path location when deploying the Cache component.
Download the Executable
Latest Release
Navigate to the autonomys/subspace Github. On the right side, click the latest release. The Cluster uses the Farmer executable.

At the time of this wiki, the latest release is mainnet-2024-nov-06 and this version will be used in the examples within this wiki. Ensure that the latest version is downloaded, and the commands below are updated to reference the latest version.
Identify Farm Disks
When running the Cluster Farmer, the path and size of the Farm disks is required. If you followed the guide to prepare your Farmer drives, you should already have them prepped and ready to be added.

Cluster Controller
The Controller should be started first. In this guide, all Cluster components will be created as PowerShell scripts which will make the deployment process easier. Open up Notepad and paste in the contents of the applicable script below
Select Script
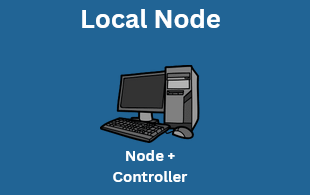
If your Node and Controller will be on the same host, use the Local Controller PowerShell Script.
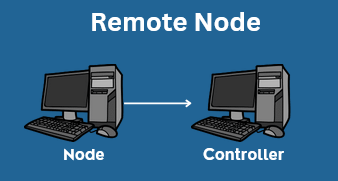
If your Node and Controller will be on different hosts, use the Remote Controller PowerShell Script.
Update Script
Read through the comments in the script to determine if anything needs to be modified or updated. Pay attention to the following:
- If using a Remote Controller ensure the Node IP and Port are correct
- If NATS is running on a different host, update the IP so that it points to the host running NATS
- If Prometheus is running on a different host, update the IP so that it points to the host running Prometheus
- Ensure the
.exefile matches the one downloaded
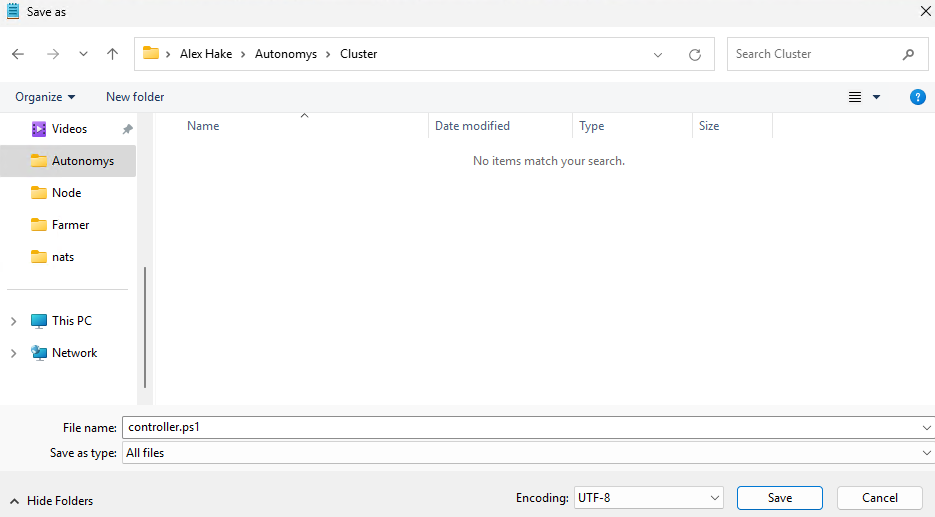
Save Script
When ready, click "File" > "Save as". Locate and select the "Cluster" folder created earlier as the save location. Then update the "File name" to controller.ps1 and select "All files" from the "Save as type" drop down. Then click "Save".
If the file needs to be edited, simply double click the controller file and Notepad will be opened.
Running Scripts
If you try to run the script and you get no error and no output you need to install Microsoft Visual C++ Redistributable. Navigate to Visual C++ Redistributable. In most cases the vc_redist.x64.exe is the right version. Install it and then reboot.
This will only be covered once as it is the same process for the Controller script as it is for the rest of the scripts. Now that the PowerShell script has been created, the Controller can be started. There are two methods that can be used to start the controller.ps1 script.
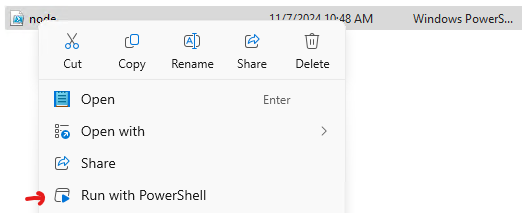
Run with Powershell
The easiest way is to right click on the controller file, and then click "Run with Powershell". However, if there is an error with the script, it will close out immediately and the error can not be viewed.
Open in Terminal
The second method is to right click inside the folder (not on the script file directly) and then select "Open in Terminal".

This will bring up a Terminal already positioned in the Cluster folder. Simply type "controller" and then press tab to autocomplete. It should look like .\controller.ps1.
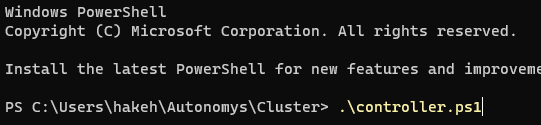
Then hit "Enter" to start the controller.
Post Launch
After the Controller is launched, it will make a connection with NATS and then wait for other components to join.
Cluster Cache
The Cache stores the piece_cache.bin in the specified directory. The piece cache is used by the Plotter and is an essential part of the Cluster. To learn more about the piece cache check out this Forum Post on the Autonomys forums.
Create Script
Open up a new Notepad file and copy the Cluster Cache contents into the Notepad.
Read through the comments to determine if anything needs to be modified or updated. Pay attention to the following:
- If NATS is running on a different host, update the IP so that it points to the host running NATS
- If Prometheus is running on a different host, update the IP so that it points to the host running Prometheus
- Specify the Cache and Size as appropriate for your setup
- Ensure the
.exefile matches the one downloaded
Save Script
When ready, click "File" > "Save as". Locate and select the "Cluster" folder created earlier as the save location. Then update the "File name" to cache.ps1 and select "All files" from the "Save as type" drop down. Then click "Save".
Run Script
Use one of the methods described above to start the Cache.
Post Launch
After launching the Cache, it should connect to NATS and print out its "Cache ID". Check the Controller logs to make sure the Cache was identified and initialize. The Piece Cache will now start syncing. Depending on the size of the Cache and the size of the blockchain history this could take some time.
Cluster Plotter
The Plotter is responsible for plotting and replotting of Farm drives. Typically, it is best practice to run the Plotter, Controller, Cache, and NATS all on the same host to reduce network bandwidth. Data must be transferred between the Cache -> Plotter -> Farmer in order to plot the Farm disks. This is a complex topic and outside the scope of this guide. However keep in mind that high end GPUs may fully saturate the network if using 1G.
If a compatible GPU is detected, it will automatically disable CPU plotting and enable GPU plotting. Plotting will begin as soon as a Farmer has been added to the Cluster.
Create Script
Open up a new Notepad file and copy the Cluster Plotter contents into the Notepad.
Read through the comments to determine if anything needs to be modified or updated. Pay attention to the following:
- If NATS is running on a different host, update the IP so that it points to the host running NATS
- If Prometheus is running on a different host, update the IP so that it points to the host running Prometheus
Save Script
When ready, click "File" > "Save as". Locate and select the "Cluster" folder created earlier as the save location. Then update the "File name" to plotter.ps1 and select "All files" from the "Save as type" drop down. Then click "Save".
Run Script
Use one of the methods described above to start the Plotter.
Cluster Farmer
The Farmer is reponsible for farming the disks. If a Plotter is on the Cluster, plotting will begin as soon as the Farmer joins the Cluster.
Create Script
Open up a new Notepad file and copy the Cluster Farmer contents into the Notepad.
Read through the comments to determine if anything needs to be modified or updated. Pay attention to the following:
- If NATS is running on a different host, update the IP so that it points to the host running NATS
- If Prometheus is running on a different host, update the IP so that it points to the host running Prometheus
- Update the reward address
- Add the path and size for each Farm connected to the Farmer
Save Script
When ready, click "File" > "Save as". Locate and select the "Cluster" folder created earlier as the save location. Then update the "File name" to farmer.ps1 and select "All files" from the "Save as type" drop down. Then click "Save".
Run Script
Use one of the methods described above to start the Farmer. The Farmer will connect to NATS then perform some checks before starting. The Controller will automatically discover and initialize and log the Farm. The Plotter will begin plotting as soon as it has a sufficient piece cache. Some initial logs may be printed regarding plotting immediately, but there may not be new ones for some time as the piece cache is synced. Windows may also perform a long initialization of the disks when first connected, so there may be high disk usage for some time.
Next Steps
Plotting may not start until the Piece Cache is finished. Once plotting begins the disk(s) will be fully plotted. Typically many sectors will go stale while plotting and require an immediate replot after the initial plotting is complete. This may occur a few times, but eventually replots will lessen. You must keep the Terminal windows open for the components to keep running. If the Cluster/Node needs to be shutdown to upgrade or for maintenance, it is best to shut the components down in the reverse order they were started.
Logging
Each component will log data to a file located in the Cluster folder. These logs can be helpful if requesting help with something on the Forums or Discord.
Updates & Maintenance
If there is a need to update the Cluster or shut it down for maintenance, it is recommended to shut the components down in reverse order. Start with the Plotter OR Farmer => Cache => Controller => NATS => Node. It probably will not hurt anything if the Cluster is not shutdown in the correct order, but it may produce some errors in the logs.