Deploy Portainer Server
Prerequisites
Portainer Server
Create Volume
Open up a terminal in Windows with win + x and then select "Terminal". Create the "portainer_data" volume
docker volume create portainer_data
Deploy Server
Then deploy the portainer server:
docker run -d -p 8000:8000 -p 9443:9443 --name portainer --restart=always -v /var/run/docker.sock:/var/run/docker.sock -v portainer_data:/data portainer/portainer-ce:2.21.3
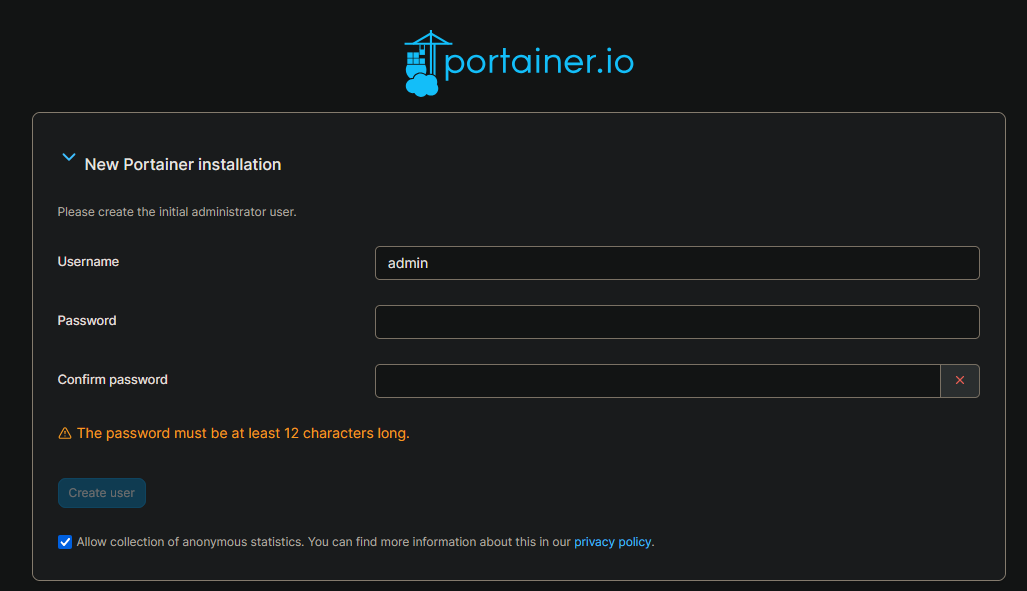
Open Portainer
In the browser, navigate to "https://localhost:9443".

This is okay, it's because it is using a self-signed certificate since you are hosting the website locally. Click "Advanced" and then "Accept the Risk and Continue". Now you need to create a login for Portainer, I usually leave the Username as "Admin" and then create whatever password you wish. Then hit "Create user".
Once you log in, click the big "Get Started" button to view your Environments
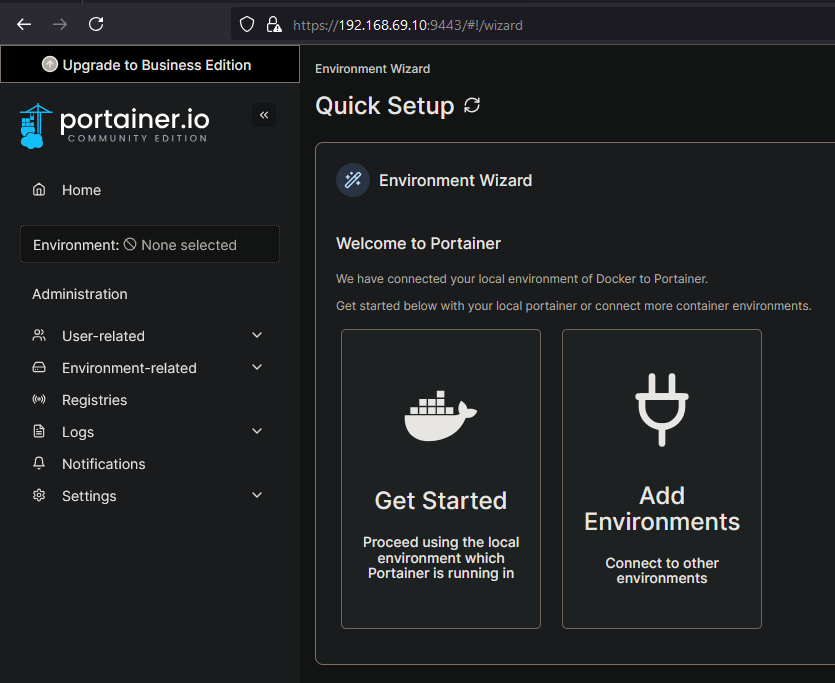
Here is where you can view your PC running Portainer.
This is not really a guide on how to use Portainer, but a few quick notes: If you click the card for the "local" environment that is the PC running Portainer. We will see how to add external environments for other PCs running on your network soon. But inside this environment there is a menu on the left side that has all sorts of options - for the most part this can also be seen in the main content area
- Stacks - These are like Docker Compose files, basically infrastructure as code. Allowing you to deploy many Docker containers at once.
- Container - This will list out all the containers you have running
- Image - This will show you all the images you have downloaded
- Volume - This will show you all the volumes you have created
- Networks - If you see the pattern here, this will show you the Networks. By default you will already have some.