Grafana
Introduction
This guide will provide instructions on how to install Grafana on Windows 11.
OSS vs Enterprise
There are two versions: OSS (open source) and Enterprise. They are both free and have the same features. If you may want to get a license and pay for Grafana then use the Enterprise version as it can be unlocked without needing to reinstall. I will use the OSS version in this guide.
Download
The first step is to download the Grafana installer. Navigate to the Grafana Downloads and download the installer. When executing the MSI file, you will probably get a warning from windows from Microsoft Defender. Assuming you got the MSI file from the link I provided, there is no security risk, however it is up to you if you want to proceed. I accept the defaults and let the installer proceed.
Configure Grafana
Once the installation has been completed Grafana will be running at http://localhost:3000.
Change Default Port
Port 3000 can be a bit busy. If you need to change the port you will need to create a custom.ini file.
Open up Notepad with Admin privileges.
Click File > Open, and then navigate to C:\Program Files\GrafanaLabs\grafana\conf
Change the drop down to the right of the "File name" input to be "All files" and then open sample
Scroll down and delete the ; in front of http_port and update the value to the desired port
![]()
Click File > Save As, then in the "File name" input, enter custom.ini. Change the "Save as type" to "All Files".

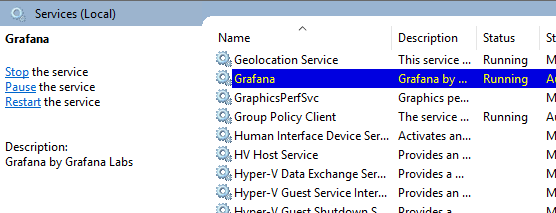
In the windows search bar type services.msc and then find Grafana. Then right click and choose 'restart'.
Back in the browser, navigate to the new port. In my case, http://localhost:9999
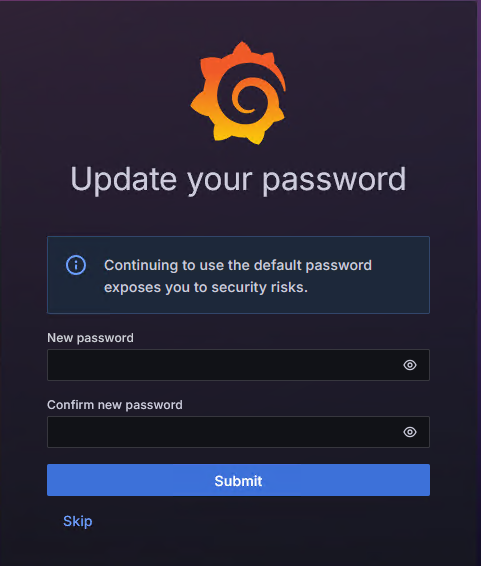
Login
To log in, the email and password are admin. Change the password to something more secure, and then click "Submit".
Grafana is now installed on the system as a service locally and a data source can be added.