Node - Linux/Windows (Docker)
This guide currently uses the Taurus testnet. It will be updated to include mainnet instructions once released
Prerequisites
System Requirements
Please check the Official Wiki for System Requirements
Port Forwarding
The Node will need to forward two ports in order to connect to peers successfully. This can vary by router and it is typically best to google the router's model number along with the term "port forward". There are a lot of Resources about how to do this. Ports 30333 and 30433 both need to be forwarded. If these ports are already in use, new ones can be specified in the command line
One way to make sure the ports were forwarded correctly is to check you get signal. Just enter 30333 and 30433 and click "Check".
System Readiness
These guides will help ensure your system is ready for deploying a Node
- Install Docker on Ubuntu: Docker Install
- Install Portainer on UbuntuPortainer Install
Storing Node Data
There are two options for storing the Node data:
- Store it as a volume in Docker
- Mount a specific location
If the OS drive has sufficient space, using a volume in Docker is the most straight forward way. This is how I typically run my Nodes. A bind mount can be used to mount a secondary drive, or a specific path on the OS drive. Both examples will be covered.
Create Autonomys Docker network
Anytime I deploy an Autonomys container I first create a dedicated network on Docker. This reduces the chance for port conflicts and provides a great way to organize my containers. This step is optional, but will be consistent across all of my guides, so make sure to make appropriate changes as needed.
Create the Autonomys Docker network
- Linux
- Windows
sudo docker network create \
  --driver bridge \
  --subnet 172.25.0.0/16 \
  --gateway 172.25.0.1 \
  autonomys-network
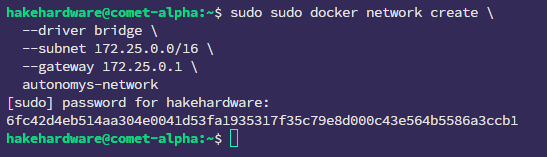
docker network create --driver bridge --subnet 172.25.0.0/16 --gateway 172.25.0.1 autonomys-network
![]()
This creates a new network called "autonomys-network" using the subnet 172.25.0.0/16 and the gateway 172.25.0.1.
Stack File
In Portainer, create a Stack called "autonomys-node". I have a GitHub repo set up for all of my Autonomys files so that they are always the latest version.
- Mainnet
- Taurus
Not available yet. Expected release is 11/6
Update the Stack file
Update the Release
Check the Autonomys Subspace Releases page to find the latest version. Make sure to select the appropriate network (Taurus is the testnet).
Uncomment Platform
If you are using the aarch64 version uncomment the platform: linux/amd64 in the Stack file. This is typically only for ARM CPUs
Update the Name
The name is used for the telemetry server and can be set to whatever is relevant to the user
Labels
If using Spaceport to monitor the Node, the label "Node 1" can be updated to a descriptive name. This will be imported into Spaceport.
Update Timezone
Add the Timezone where it says <YOUR TIMEZONE>
Node Data
The example is using a docker Volume which means the Node Data will be stored on the host OS. I HIGHLY recommend this for Windows. To set a specific path to store the Node data update
the line node-data:/var/subspace:rw to specify the path, like /your/node/data/path:/var/subspace:rw. Then delete the section at the bottom which
specifies the node:
volumes:
  node-data:
Important Notes
Here are some things that are important to know about the Node
- The node is using ports 30333/30433. If there are conflicts, the ports can be changed in the stack file, but make sure to change them
in both the
portsandcommandsection. - The Farmer (or Cluster Controller) will connect to the node on Port 9944
- Prometheus metrics will be broadcast on port 9080, see the Grafana guide on how to monitor a Node with Grafana
- The Node will be deployed to the autonomys-network on
172.25.0.100.
Deploy the Stack
Once the stack file is ready, scroll down and click the "Deploy" button. At this point the image will be downloaded and the node will be deployed, this may take a moment. After the Stack is successfully deployed, the browser will be redirected to the Stack page and the container can be viewed in the "Containers" section.

To view the logs, under the "Quick Actions" column, click the first icon that looks like a sheet of paper. This is really helpful to see how things are progressing. Initially there may be only a few peers, but overtime they should increase to 40. However, this can take a few hours. If peers do not increase then it may be an issue with port forwarding.
Initially, logs will look like the following
2024-10-06T15:00:57.441368Z INFO Consensus: substrate: ⚙️ Syncing 0.0 bps, target=#3589783 (4 peers), best: #0 (0x0c12…1c34), finalized #0 (0x0c12…1c34), ⬇ 13.5kiB/s ⬆ 3.9kiB/s
Here is a simple breakdown of what is being displayed:
Syncing 0.0 bps- This is normal at first and it should increasetarget=#3589783- This is the current block height, and will increase.(4 peers)- Current peers. This should eventually increase to 40best: #0- The current synced blocks, this will eventually need to reach thetarget
Eventually the "snap sync" will happen, and there will be a large increase in the best value. It looks like this:
2024-10-06T15:05:37.481031Z INFO Consensus: substrate: ⚙️ Syncing 711748.0 bps, target=#3589832 (6 peers), best: #3558740 (0x123e…cff3), finalized #3558740 (0x123e…cff3), ⬇ 219.0kiB/s ⬆ 2.0kiB/s
The Node has now been deployed and a Farmer or Cluster Controller can be hooked up to it. Note that if the Farmer/Cluster is on the same PC the Docker IP for the Node container should be used. Otherwise, the network IP of the host PC should be used.